Gardening can have some high up-front costs, especially container gardening where you have to furnish not only the pots and seeds, but also the dirt. This spring and summer, I’ve turned my third floor balcony into an experiment in growing delicious vegetables.
Planning the garden
I wrote a very detailed post about planning a container garden back in January.
A brief review, in case you don’t want to click the link:
- I started by measuring the space (my patio).
- I then decided what kind of containers I was going to use (DIY self-watering), and figured out how many would fit on my patio.
- Once I knew how many containers would fit, I narrowed down my list of things I wanted to grow.
Before I started, I had saved around $150 for this project. I didn’t know for sure how much dirt and the containers would cost, but I hope that would get me close.
Step Four: Doing the Math & Getting the Materials
The next step was to make a list of the materials and seeds I would need, and doing the math to see what it would cost. I knew I would have to buy or find containers and other materials to make the containers, buy dirt, and buy seeds. I would also need to figure out a watering system for my containers.
Containers
I decided to go with self-watering containers, and to make all of my containers but one, the hanging basket. Here are some online instructions for making a self-watering container out of two five gallon buckets, but I followed the instructions laid out in The Vegetable Gardener’s Container Bible.
For the 18 gallon containers I would need
- 3 18 gallon storage boxes and lids — $7.98 each
- 6 5″ pieces of plastic drainpipe (each; total 18) — $10.89 for 120″ (3″ x 4″)
For the 5 gallon containers I would need
- 12 5 gallon buckets — Free from a restaurant I used to work at
- 1 4″ piece of plastic drainpipe (each; total 6) — $10.89 for 120″ (3″ x 4″)
I was also going to need a drill, a 1/4″ drill bit, a tape measure, a hacksaw, and some caulk to keep the drainpipe in place, all of which I have. I was going to need something to cut the plastic (a box cutter might have done the job, but I bought cheap pair of tin snips ($8.99)). The video above recommends a hole saw bit, but I didn’t have one, so I went with the tin snips. It worked… well enough.
I bought 1 12″ diameter self-watering hanging basket — $8.99
Total cost for containers: $28.98
Considering that a store-bought container costs anywhere from $9 to $54, depending on what you get and where you get it, I’d say $29 isn’t too bad for 12 containers.
Dirt
To fill my my containers (3 18 gallon containers, 6 5 gallon containers, 2 window boxes, and 1 hanging basket), I determined that I would 18 cubic feet of dirt.
| The math of dirt 18 gallon storage container – 6 gallons of water space = 12 gallons = 2 cu ft of dirt x 3 containers = 6 cu ft (I found this gallon to cubic feet table later; it would have helped.) 5 gallon bucket (not minus anything because the buckets are nesting) = 1.5 cu ft of dirt x 6 containers = 9 cu ft Window box = 1 cu ft of dirt x 2 boxes = 2 cu ft Hanging basket = .5 cu ft Total: 17.5 cu ft of dirt |
I decided to go with 18 cu ft of dirt, just to be on the safe side.
From my experience helping my cousin with her garden last year, I knew that King Soopers has soil/compost at very reasonable prices starting in mid-March. KS had several different kinds of dirt, but the two cheapest were Brownie Cow Manure compost ($1.89 for a 1.25 cu ft bag) and Sheep Manure compost ($2.89 for a 1.25 cu ft bag). They also had a 1.5 cu ft bag of “Sheep and Peat” for $4.89.
My aunt (who’s been gardening for years swears by her dirt recipe:
| Dirt Recipe 1 part compost 1 part peat moss 1 part vermiculite |
So, I needed 6 cu ft of compost, 6 cu ft of peat moss, and 6 cu ft of vermiculite. I decided to get 1 bag of the “Sheep and Peat”, 5 bags of the Brownie cow manure compost, and 4 bags of the sheep manure compost (Peat moss is expensive), which is 12.75 c ft of dirt. Subtotal: $26.00
I had to go to a local garden center to get vermiculite (it’s even more expensive at Home Depot), and had to buy three times as much as I needed. Boo. Subtotal: $34
It turns out I did my math wrong on the dirt (I ended up with 3 bags (3.75 cu ft) of compost left over). If I only count what I used (I sold the extra vermiculite to my cousin and am returning the three bags of dirt)…
Total cost for dirt: $19.23 + $11.33 = $30.56
Seeds
Having decided in the very beginning what we were most likely to eat if we grew it in our garden, I bought:
Cilantro — $1.79
Spicy Salad Mix (large (5 g) packet) — $2.49
Chives — $1.59
Beans (Kentucky Wonder Pole variety) — $1.89 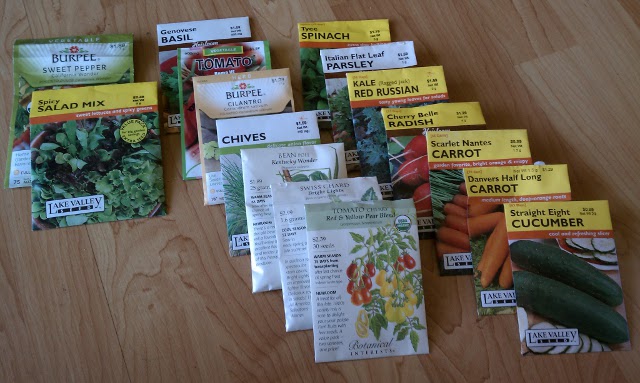
Cucumbers (Straight Eight) — $0.99
Tomatoes (Cherry, organic) — $2.39
Tomatoes (Roma) — $1.59
Sweet Peppers (California Wonder, Organic) — $1.89
Basil (Genovese, Heirloom) — $1.59
Kale (Red Russian) — $1.59
Radishes (Cherry Belle, Heirloom) — $1.29
Carrots (Danvers Half Long) — $1.29
Carrots (Scarlet Nantes) — $0.99
Parsley (Italian Flat Leaf, Heirloom) — $1.59
Spinach (Tyee, extra slow bolting) — $1.79
Swiss Chard (Bright Lights) — $2.99
Total cost of seeds: $27.74
I also bought a seed tray with plastic dome ($5) and heating pad ($20). My local garden center is a dangerous place.
Total cost for garden: $112.28
I started with a savings total of $150, which means I came in $37.72 under budget. Sweet! (And it would have been more if I hadn’t splurged on the seed tray and the heating pad. Hopefully those will be useful for many years…)
This final total may seem high, but as a point of reference, I went to Sunflower Farmers Market last week and bought a pint of cherry tomatoes, 2 bunches of kale, 2 green peppers, 1 bunch of chard, and 2 containers of baby greens for $25. That’s about what I buy in veggies every week or so, and not an unreasonable amount of vegetables to expect from our garden in a week.
By that math, my garden will pay for itself after 4-6 weeks of production. And, next year I will only have to buy a few packets of seeds and maybe some dirt to replenish the dirt in the containers.
Gardening is awesome.
Step 6: Putting it All Together
After I had all of the materials, everything started coming together pretty quickly.
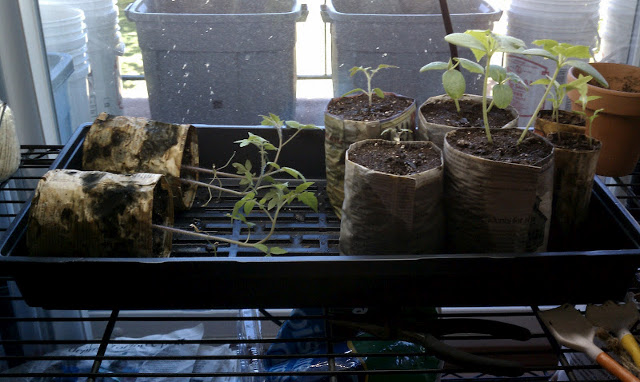
Staring the seedlings
There are a few plants (tomatoes and peppers, of the veggies I’m growing) that you have to start inside 5-7 weeks before the “last frost” (May 20th, this year, apparently).
I knew that I was only going to be able to grow one or two tomato plants (of each variety) and one or two pepper plants, so I made up four small newspaper pots (I’ll do a post on how to do this another day), filled them with dirt, and planted my seeds, 2 per pot.
I’d say they’re coming along nicely, wouldn’t you?
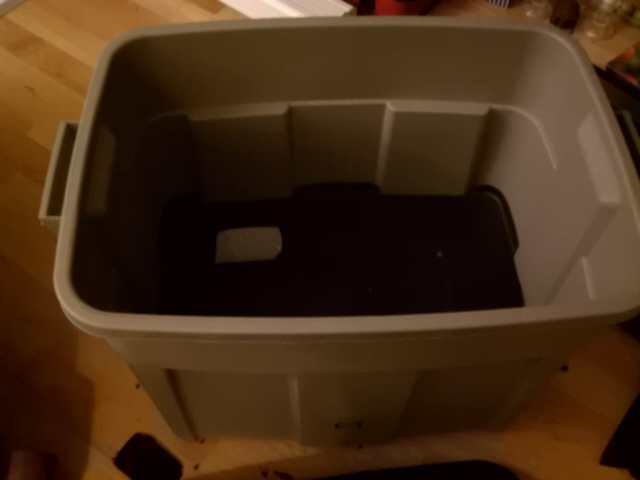
Making the Containers
Each container took me about an hour to put together, so I made them over the course of a few weeks. (If you want details on exactly how I made them, let me know.) Once I had the containers finished, I spent the next weekend filling them with dirt and putting them on the patio.
Planting the “cold season” plants
Much like there are plants that you want to plant “after the last frost” there are a bunch of plants that prefer the weather a little cooler. Of my collection, I could plant kale, chard, lettuce, spinach, parsley, radishes, and carrots, so that’s just what I did.
Once the seeds were in, I filled the reservoirs of the in-use self-watering containers, and waited to see what would happen.
My patience has been well-rewarded. 😀


{ 1 trackback }